 Tweet
Tweet
Over the past couple months I have been quite busy, developing a "kit" to allow the dedicated Z31 owner to easily install a 240sx rear suspension into there Z31 chassis. The kit takes away all of the measuring/thinking required for the swap.
The kit is still in its prototype phase, so you will notice from the pictures that things are tack welded, or only partly assembled. I will update with more when all is complete. Note that I am using STANCE aluminum subframe bushings, but the kit allows you to use ANY aftermarket bushings, whether rubber, polyurethane, or aluminum. Additionally, any of the aftermarket 240sx subframe risers can be used to fine tune anti-squat and roll center geometry.


HOW DOES IT WORK?
Perhaps you already have an idea of whats required for mounting the 240sx subframe in a Z31, as its been documented by Z31Performance member Butter in this thread: viewtopic.php?f=2&t=22 In short, the rear mounts of the subframe line up with a frame member in the rear of the car. The front mounts nearly reach the Z31 chassis spikes, but require some extension of some sorts for the install. Some light notching/hammering is also required.
One issue that people always run into with installing the kit is the measurements and calculations. Centering the subframe is very important, but perhaps more important is getting the subframe "tilt" correct; it dictates anti-squat and roll center. This tilt is critical for how the rear of the car grips. Some people want less, others want more. To find a middle ground, I have taken the time to compare the chassis measurements of the S13 and Z31 rear chassis. Given this, the kit is correctly designed to give you the exact same anti-squat and roll center dimensions of the S13 chassis. Many aftermarket "riser bushings" exist (SPL parts for example) to fine tune subframe tilt, allowing you to increase or decrease the traction available at the rear of the car.
The kit I have created includes two main pieces, which I will call the rear bar, and the front extensions.
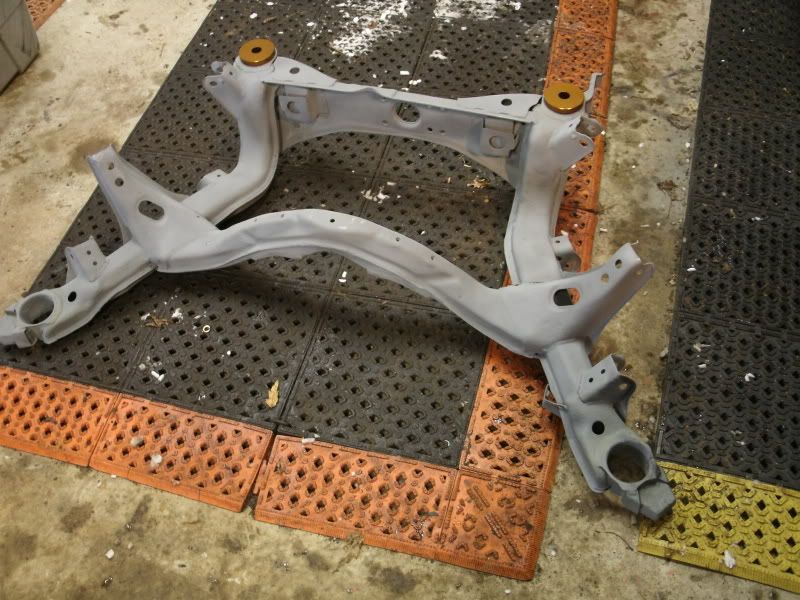
The Rear Bar
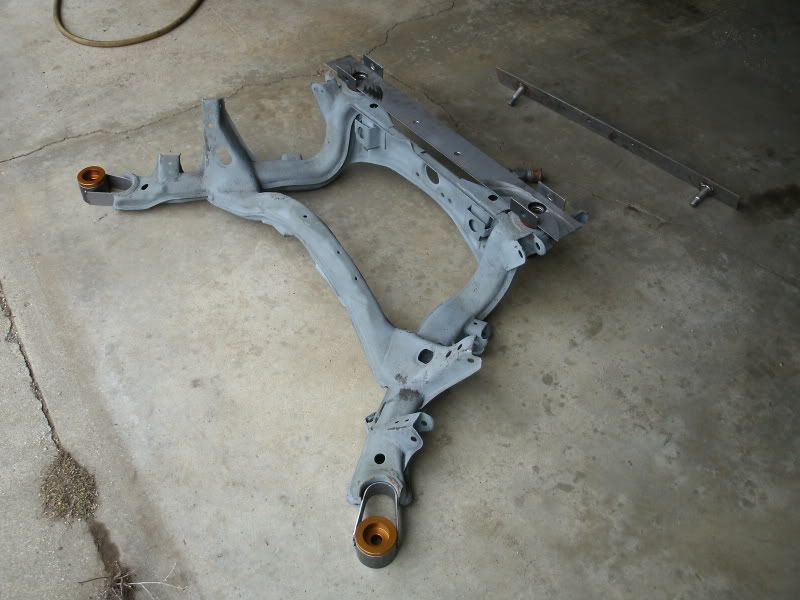
The rear bars purpose is to locate and secure the rear mounts of the subframe. For install, the bar is mounted to the Z31 chassis, aligning with the OEM differential mount studs.
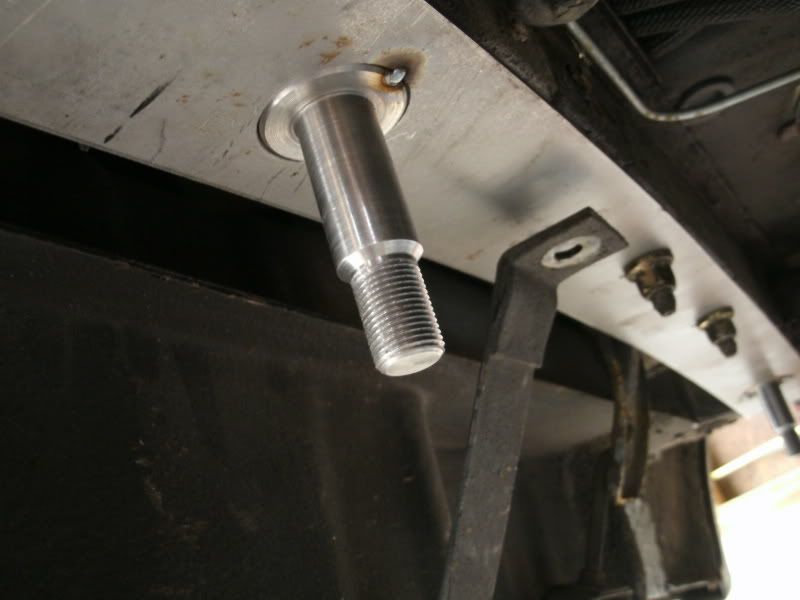
As pictured above, two CNC machined steel "spikes" extend from the rear bar. These spikes are the new mounting studs for the 240sx subframe. Once secured by the OEM differential mount studs, the rear bar is welded to the frame member, including these C-channel pieces:
This completes the mounting of the rear of the subframe. You now have 2 studs protruding from the Z31 chassis to accept the 240sx subframe.
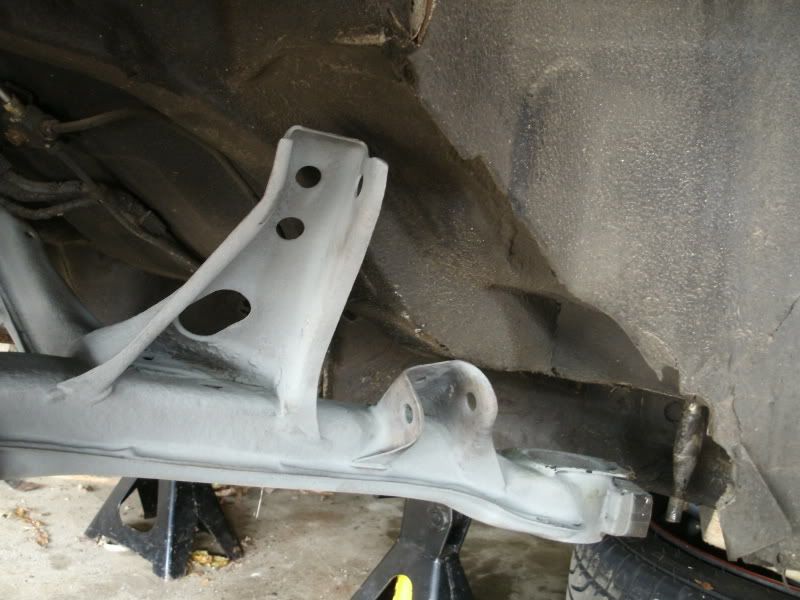
The Front Extensions
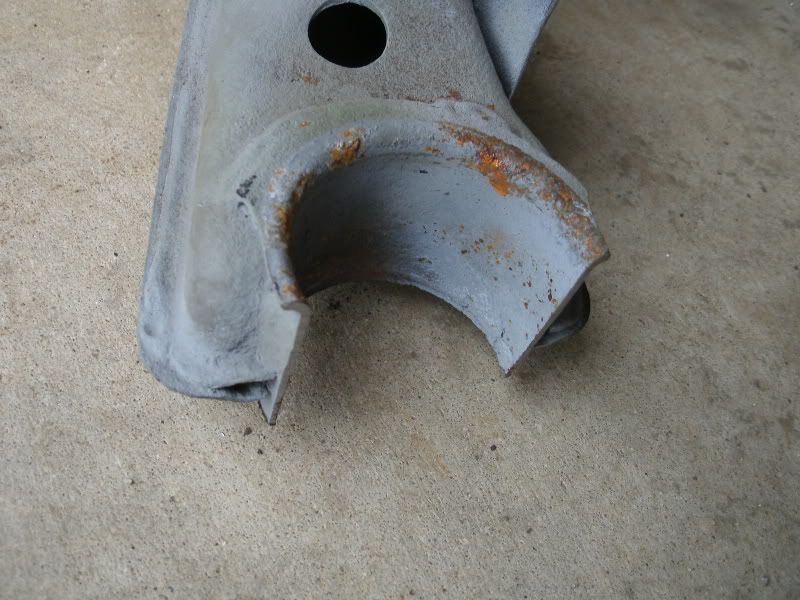
With the rear of the subframe bolted up into place over the studs, the front mounts are now examined. The OE 240sx subframe mounts are a bit short; they dont fully extend to the Z31 chassis studs:
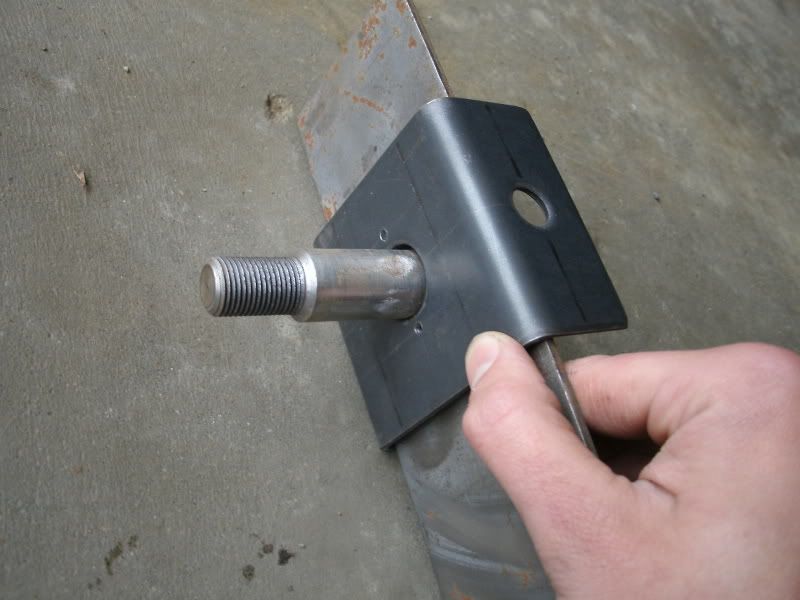
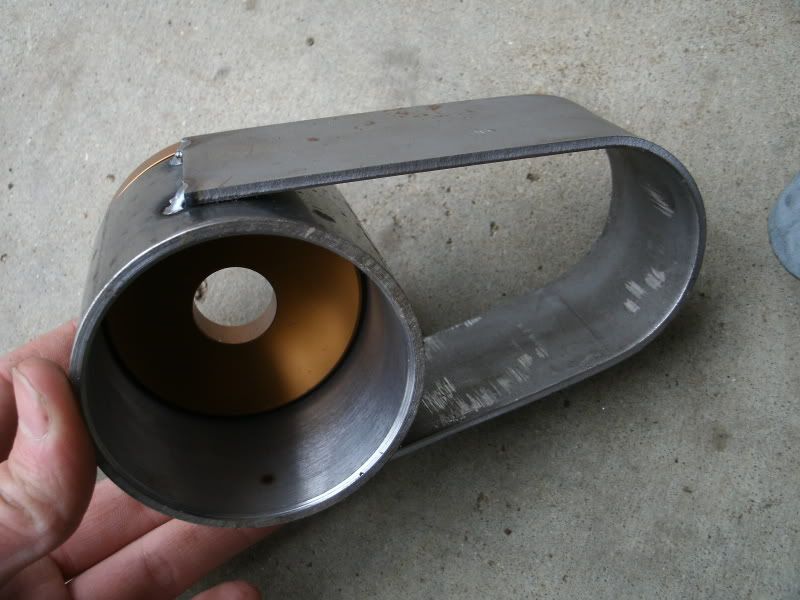
To extend the subframe mounts, first the mount is cut in half:
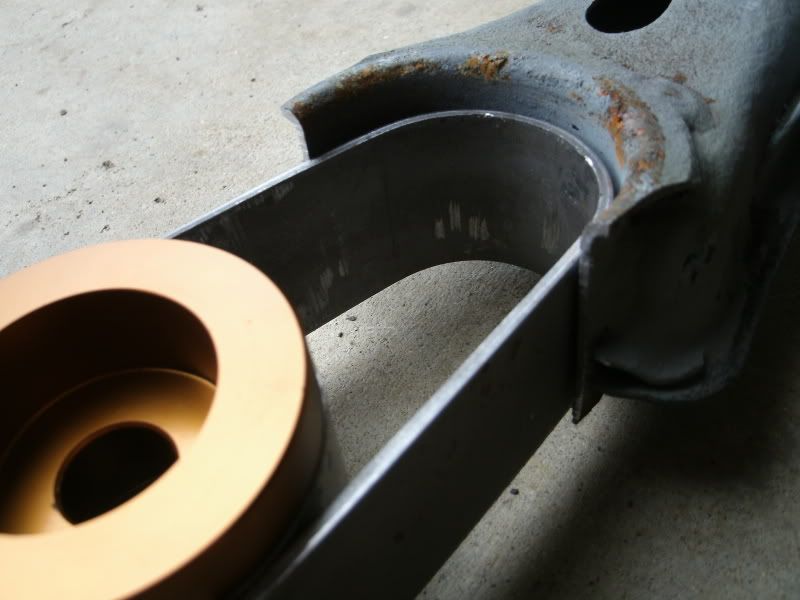
Then, this piece (front extension) is welded to the subframe. An additional gusset plate will box the "U" shape in, and will be fully welded.
[u]WHAT COMES IN THE KIT/WHAT DO I NEED?
The kit includes the rear bar with CNC machined studs already TIG welded in place. Two C-channel pieces are included to "cup" the frame rail and be welded in place. The kit includes two "U" pieces to extend the front mounts, and associated gusset plate.
To install the kit you will need a MIG welder and angle grinder. You will need some type of aftermarket subframe mounts, whether aluminum or polyurethane, such as STANCE, or SPL. You will need to do some notching of the frame rails. When using the wider S14/S15 subframe, you will NEED TO HAVE offset S13 conversion bushings such as these:

Obviously, to experience the benefits of this swap, you will want aftermarket suspension links for camber, toe and traction adjustment. You also need to hook up the 240sx brakes, and have an extended driveshaft.. This is all covered in the multi-link swap thread posted above.
WHAT'S THE COST?
See this thread for more details!
http://z31performance.com/showthread...-Kit-Group-Buy
The kit is still in its prototype phase, so you will notice from the pictures that things are tack welded, or only partly assembled. I will update with more when all is complete. Note that I am using STANCE aluminum subframe bushings, but the kit allows you to use ANY aftermarket bushings, whether rubber, polyurethane, or aluminum. Additionally, any of the aftermarket 240sx subframe risers can be used to fine tune anti-squat and roll center geometry.
HOW DOES IT WORK?
Perhaps you already have an idea of whats required for mounting the 240sx subframe in a Z31, as its been documented by Z31Performance member Butter in this thread: viewtopic.php?f=2&t=22 In short, the rear mounts of the subframe line up with a frame member in the rear of the car. The front mounts nearly reach the Z31 chassis spikes, but require some extension of some sorts for the install. Some light notching/hammering is also required.
One issue that people always run into with installing the kit is the measurements and calculations. Centering the subframe is very important, but perhaps more important is getting the subframe "tilt" correct; it dictates anti-squat and roll center. This tilt is critical for how the rear of the car grips. Some people want less, others want more. To find a middle ground, I have taken the time to compare the chassis measurements of the S13 and Z31 rear chassis. Given this, the kit is correctly designed to give you the exact same anti-squat and roll center dimensions of the S13 chassis. Many aftermarket "riser bushings" exist (SPL parts for example) to fine tune subframe tilt, allowing you to increase or decrease the traction available at the rear of the car.
The kit I have created includes two main pieces, which I will call the rear bar, and the front extensions.
The Rear Bar
The rear bars purpose is to locate and secure the rear mounts of the subframe. For install, the bar is mounted to the Z31 chassis, aligning with the OEM differential mount studs.
As pictured above, two CNC machined steel "spikes" extend from the rear bar. These spikes are the new mounting studs for the 240sx subframe. Once secured by the OEM differential mount studs, the rear bar is welded to the frame member, including these C-channel pieces:
This completes the mounting of the rear of the subframe. You now have 2 studs protruding from the Z31 chassis to accept the 240sx subframe.
The Front Extensions
With the rear of the subframe bolted up into place over the studs, the front mounts are now examined. The OE 240sx subframe mounts are a bit short; they dont fully extend to the Z31 chassis studs:
To extend the subframe mounts, first the mount is cut in half:
Then, this piece (front extension) is welded to the subframe. An additional gusset plate will box the "U" shape in, and will be fully welded.
[u]WHAT COMES IN THE KIT/WHAT DO I NEED?
The kit includes the rear bar with CNC machined studs already TIG welded in place. Two C-channel pieces are included to "cup" the frame rail and be welded in place. The kit includes two "U" pieces to extend the front mounts, and associated gusset plate.
To install the kit you will need a MIG welder and angle grinder. You will need some type of aftermarket subframe mounts, whether aluminum or polyurethane, such as STANCE, or SPL. You will need to do some notching of the frame rails. When using the wider S14/S15 subframe, you will NEED TO HAVE offset S13 conversion bushings such as these:
Obviously, to experience the benefits of this swap, you will want aftermarket suspension links for camber, toe and traction adjustment. You also need to hook up the 240sx brakes, and have an extended driveshaft.. This is all covered in the multi-link swap thread posted above.
WHAT'S THE COST?
See this thread for more details!
http://z31performance.com/showthread...-Kit-Group-Buy


Comment