 Tweet
Tweet
This has nothing to do with Z31s, but many members here are technicians and may be able to use this information. Feel free to move this somewhere else if this is the wrong section. All photos are potato phone quality.
I am in no way responsible if you hurt yourself, others, your alignment machine, customers, the environment, etc. Proceed at your own risk
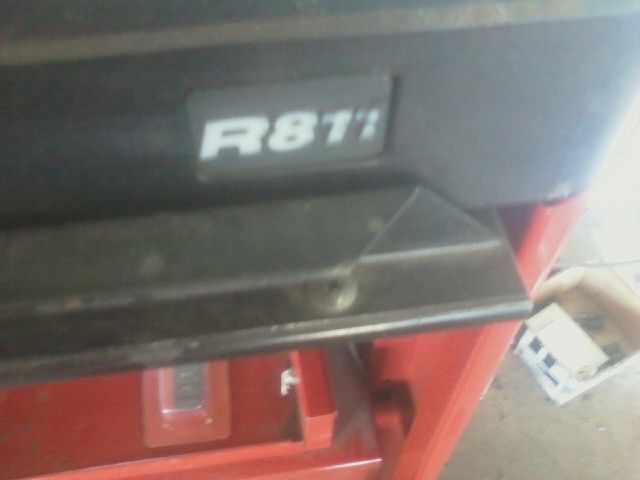
Our shop's Hunter R811 alignment machine (Hawkeye) started displaying an error "Cannot connect to Hunter Interface Device. This device is needed to verify blahblahblah" when opening the WinAlign software. Sound output had also stopped working. The boss was dragging feet on making a service call, so I tore into it myself.
Tools required:
Philips #2
3/8" deep socket
6" extension
Ratchet
Multimeter
Jumpers
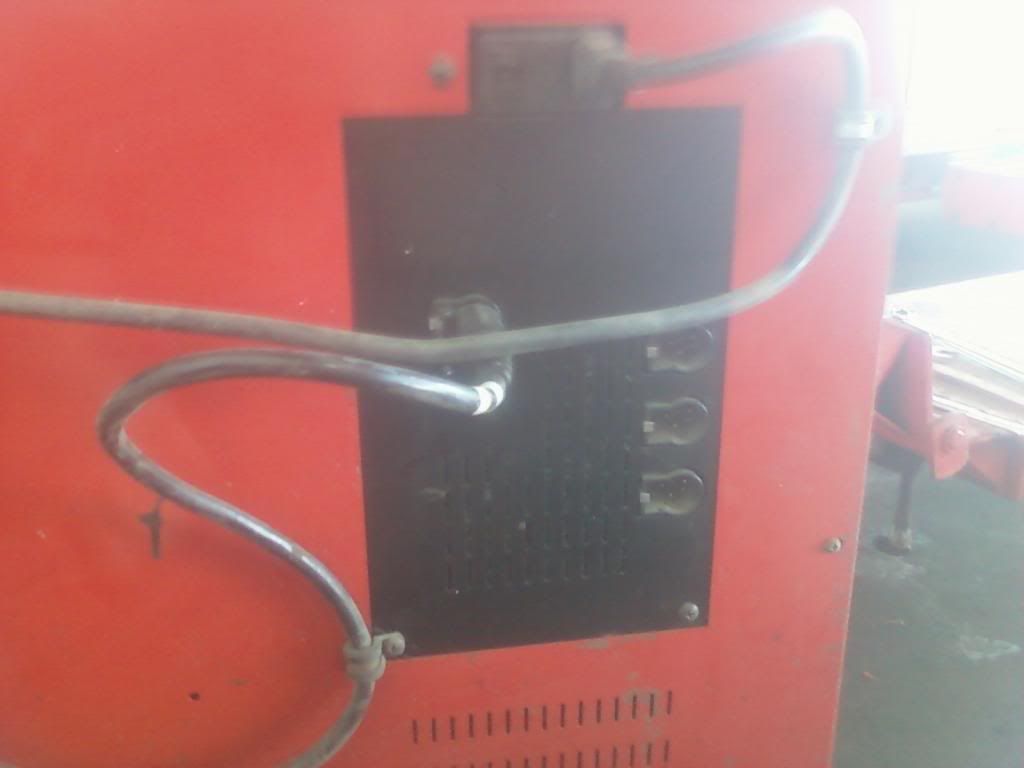
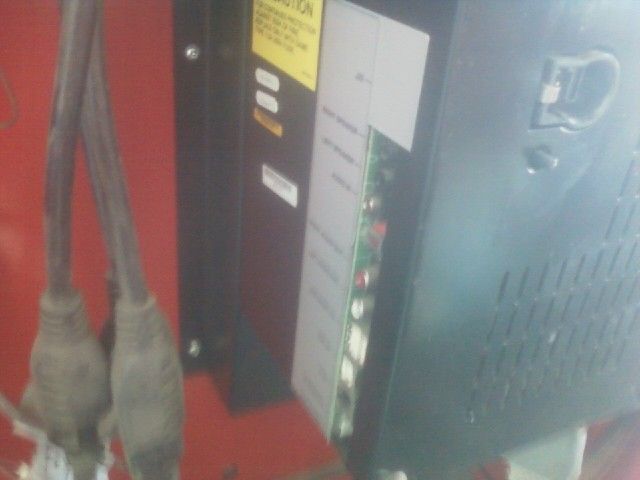
This is the "Hunter Interface Device." Its located on the back side of the unit. Remove the lower cover for access. There are a couple of philips screws on either side.
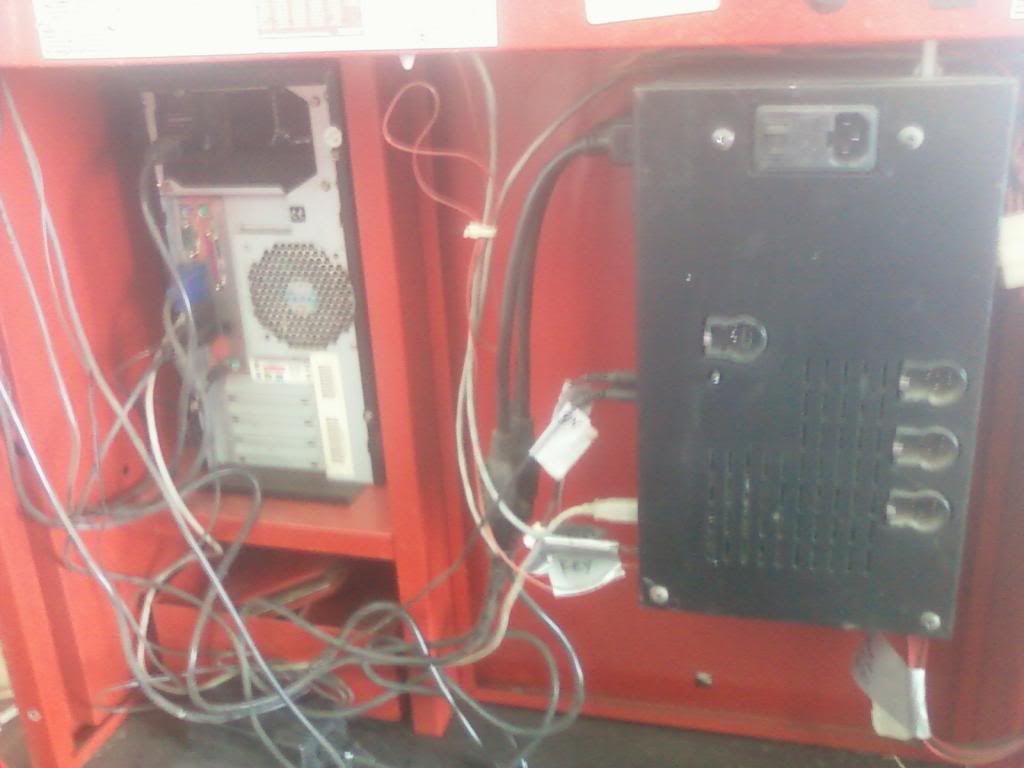
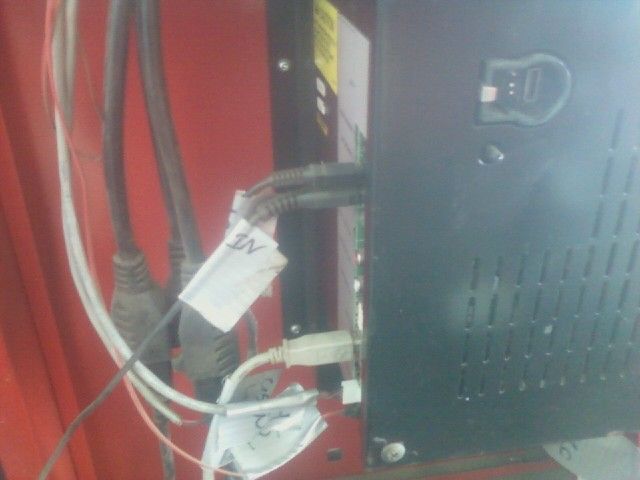
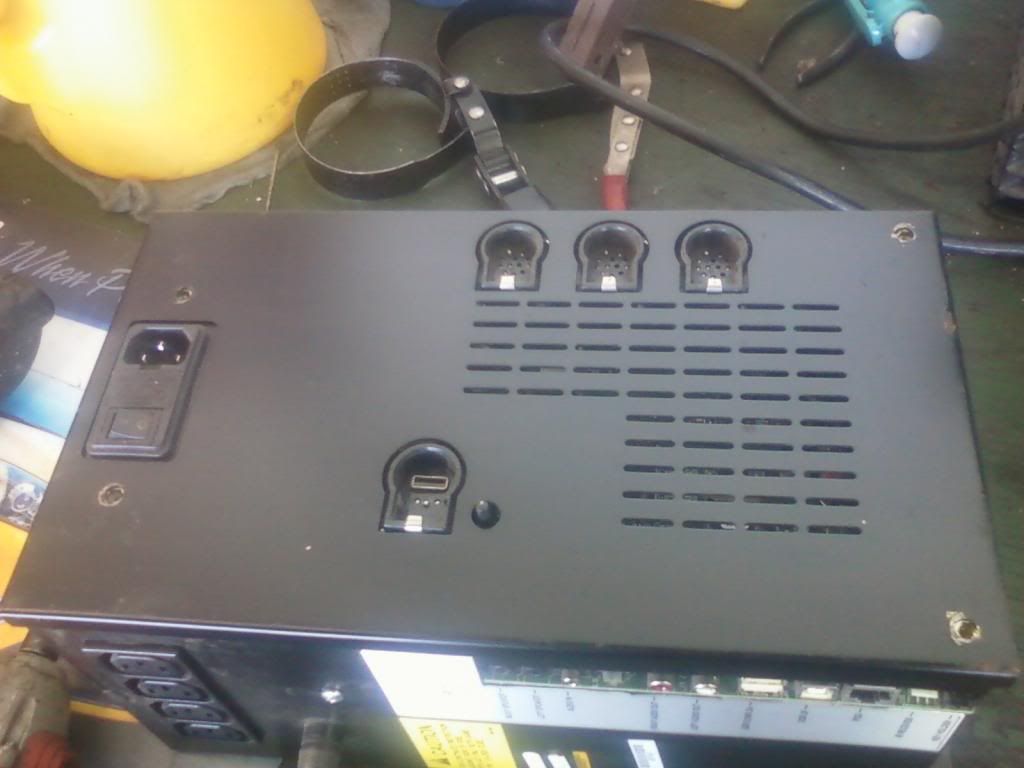
With the cover removed you will see a bunch of wires. Your machine may have more or less. Label them all and unplug everything. My setup had a plug coming from the top and bottom of the case as well.
Remove the case and place it on the bench. Its held in with 4 nuts. Use a 3/8" socket to remove them.
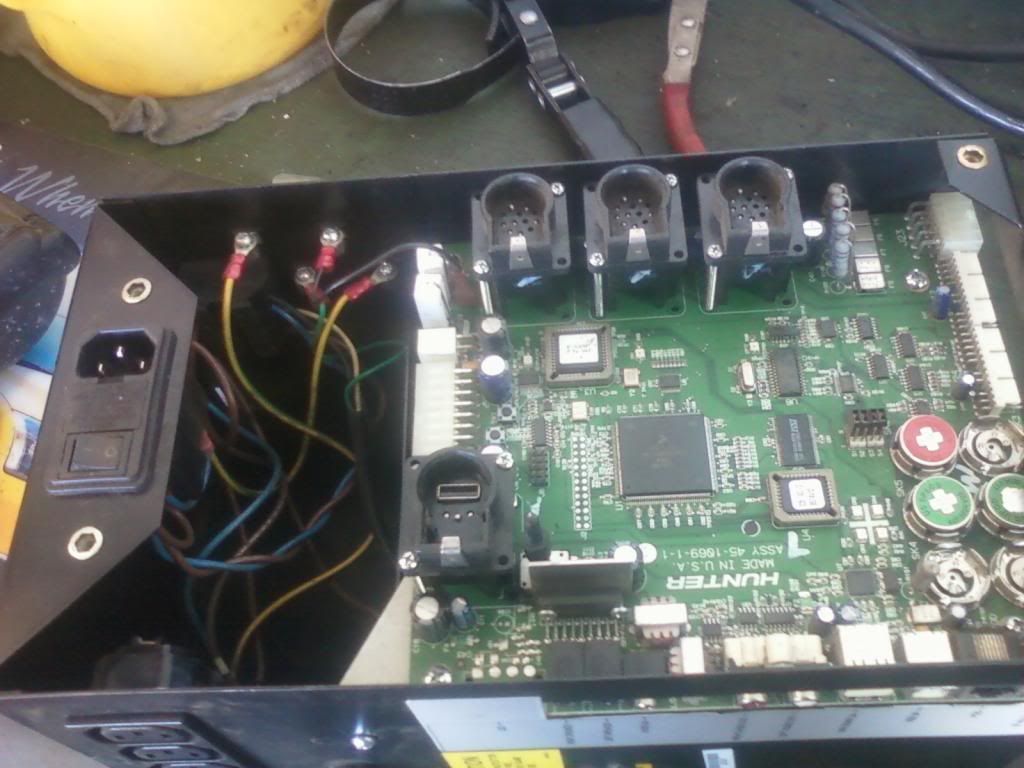
Remove the remaining screws and the cover to access the board. At this point, plug the entire unit in and look for red LEDs on the board. If they light up, the power supply is probably not the problem and you need to look elsewhere. If the LEDs do not light up, then remove the board. There are only two connectors, one ground, and 4 mounting screws. Its a very tight fit to the case.
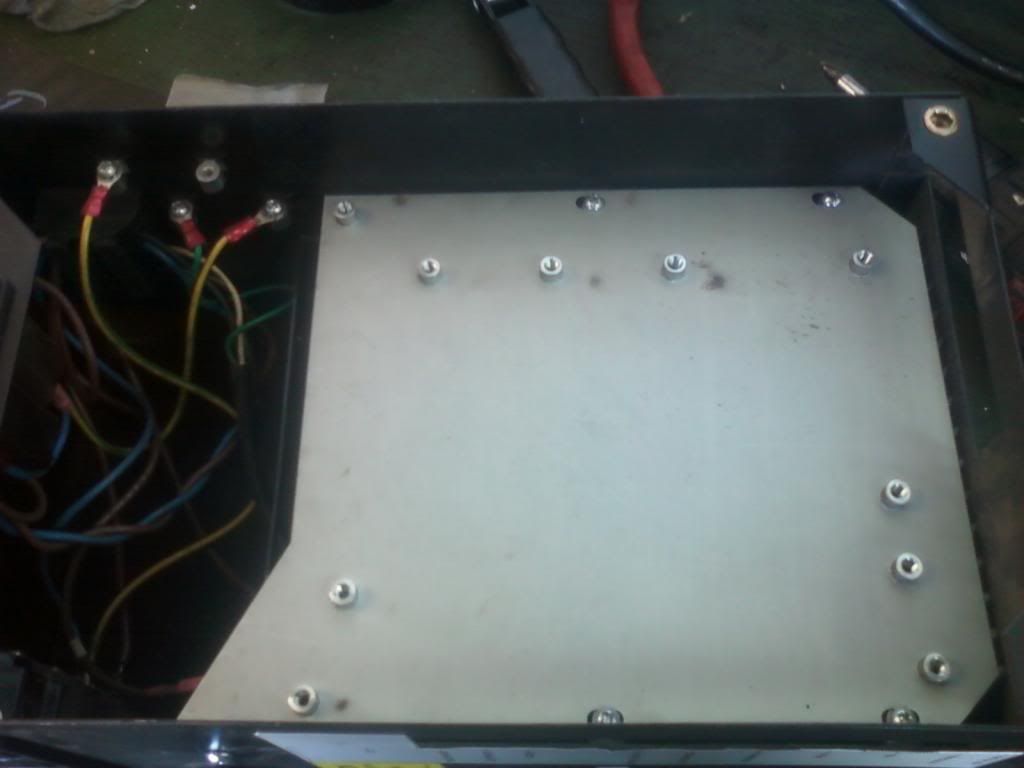
Remove the 5 screws holding this bracket in place. They are a different size than the ones for the board. Do not mix them up.
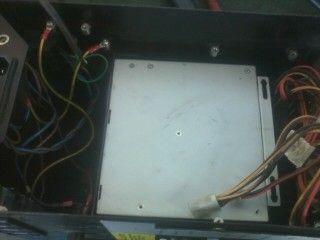
Now we can remove the power supply. 4 more nuts hold it in.
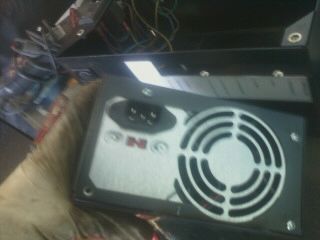
Remove the screws to free the power supply from its bracket. Its just a generic PC power supply. Match it up to another one of the same size, or find an exact replacement. Ours was a 300W unit but I replaced it with a 200W unit from an old Dell. All that is important is the 20 pin and 4 pin connectors that hook to the board, everything else is useless. You may or may not have to extend wires depending on what you find laying around.
It can't hurt to bench test the supply at this point. Plug it in, jump the green wire in the large connector to one of the blacks next to it. Use your meter to check for voltage at the 4 pin connector. You should see 12v from yellow to black if its working.
From here, reassemble everything as it came apart. Don't forget to turn the clutch on your drill down before tightening any screws. You don't want to crack the board. Plug everything in, fire it up, and enjoy your lack of error messages.
I am in no way responsible if you hurt yourself, others, your alignment machine, customers, the environment, etc. Proceed at your own risk
Our shop's Hunter R811 alignment machine (Hawkeye) started displaying an error "Cannot connect to Hunter Interface Device. This device is needed to verify blahblahblah" when opening the WinAlign software. Sound output had also stopped working. The boss was dragging feet on making a service call, so I tore into it myself.
Tools required:
Philips #2
3/8" deep socket
6" extension
Ratchet
Multimeter
Jumpers


This is the "Hunter Interface Device." Its located on the back side of the unit. Remove the lower cover for access. There are a couple of philips screws on either side.


With the cover removed you will see a bunch of wires. Your machine may have more or less. Label them all and unplug everything. My setup had a plug coming from the top and bottom of the case as well.

Remove the case and place it on the bench. Its held in with 4 nuts. Use a 3/8" socket to remove them.

Remove the remaining screws and the cover to access the board. At this point, plug the entire unit in and look for red LEDs on the board. If they light up, the power supply is probably not the problem and you need to look elsewhere. If the LEDs do not light up, then remove the board. There are only two connectors, one ground, and 4 mounting screws. Its a very tight fit to the case.

Remove the 5 screws holding this bracket in place. They are a different size than the ones for the board. Do not mix them up.

Now we can remove the power supply. 4 more nuts hold it in.

Remove the screws to free the power supply from its bracket. Its just a generic PC power supply. Match it up to another one of the same size, or find an exact replacement. Ours was a 300W unit but I replaced it with a 200W unit from an old Dell. All that is important is the 20 pin and 4 pin connectors that hook to the board, everything else is useless. You may or may not have to extend wires depending on what you find laying around.
It can't hurt to bench test the supply at this point. Plug it in, jump the green wire in the large connector to one of the blacks next to it. Use your meter to check for voltage at the 4 pin connector. You should see 12v from yellow to black if its working.
From here, reassemble everything as it came apart. Don't forget to turn the clutch on your drill down before tightening any screws. You don't want to crack the board. Plug everything in, fire it up, and enjoy your lack of error messages.
Comment