 Tweet
Tweet
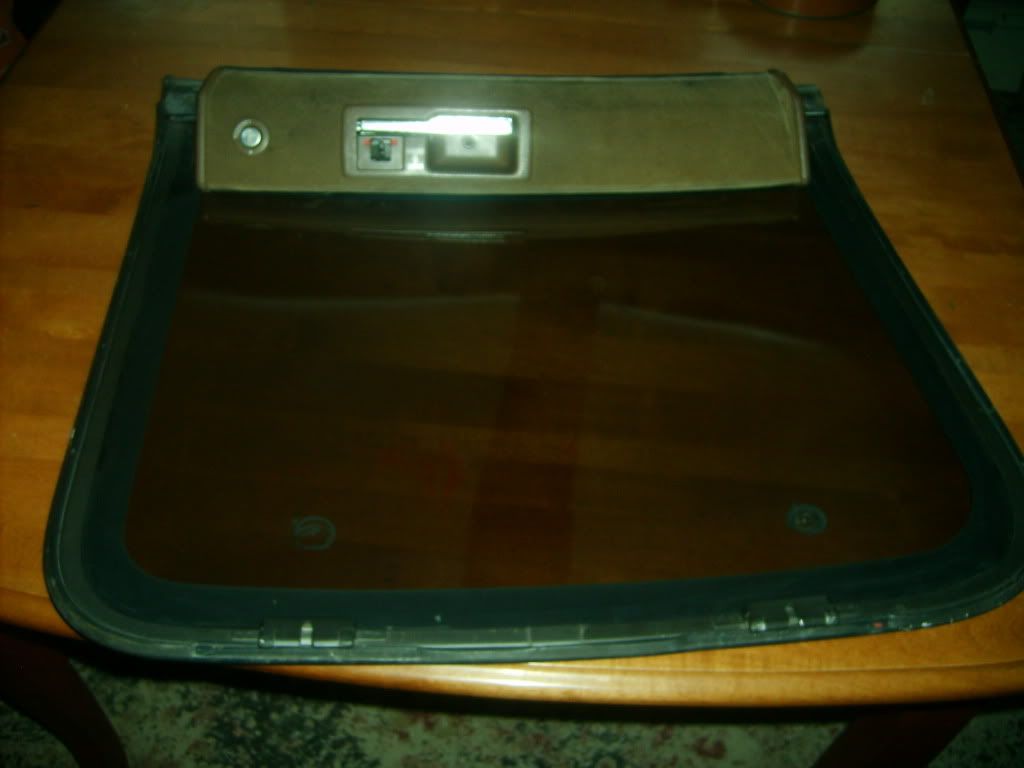
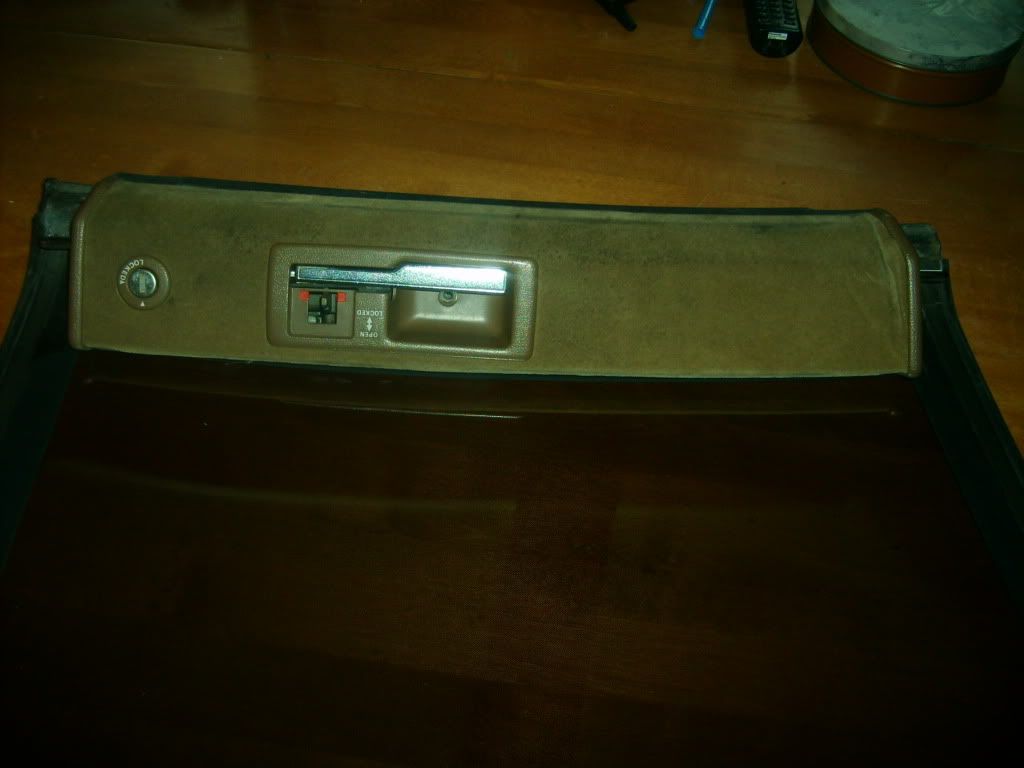
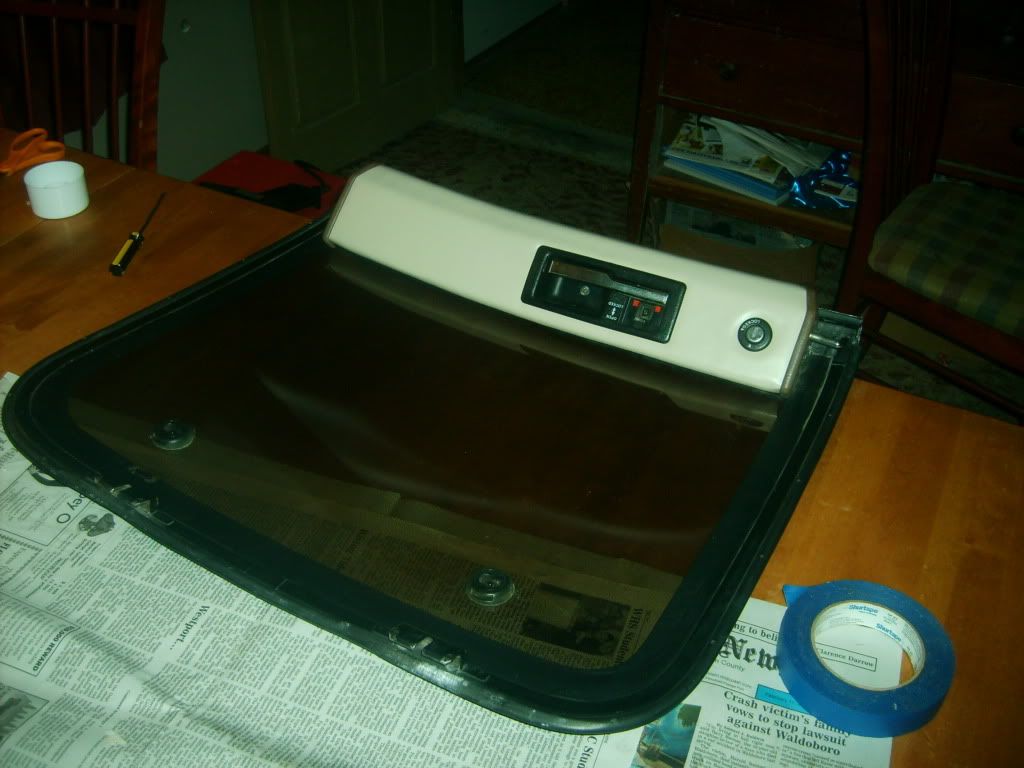
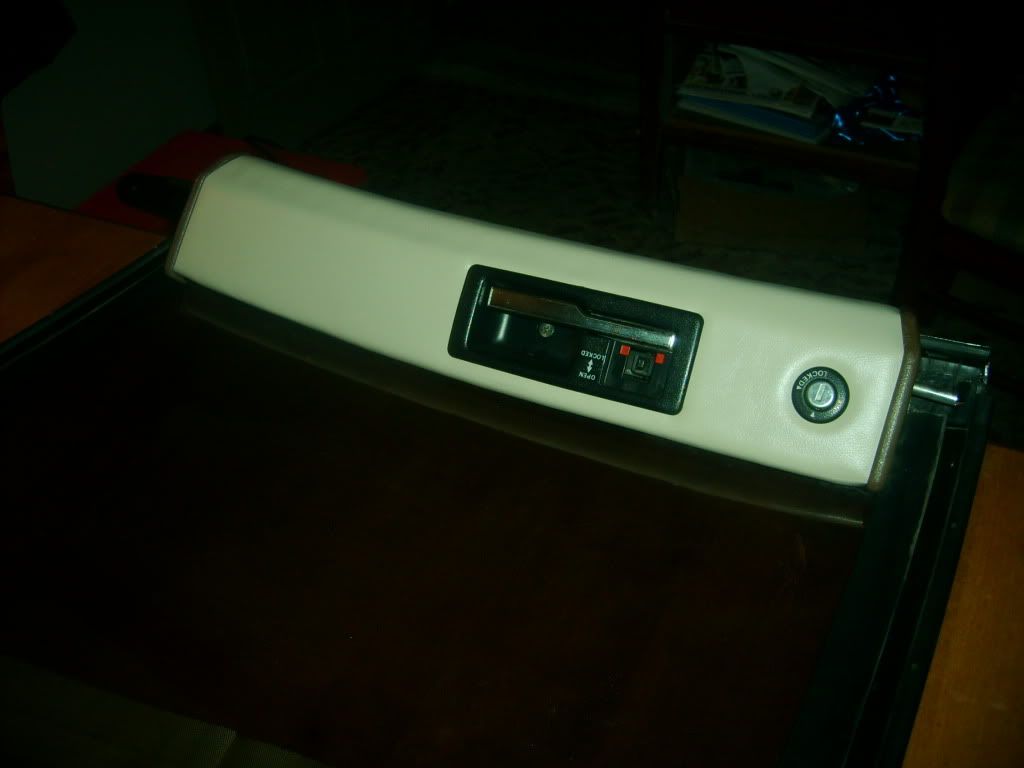
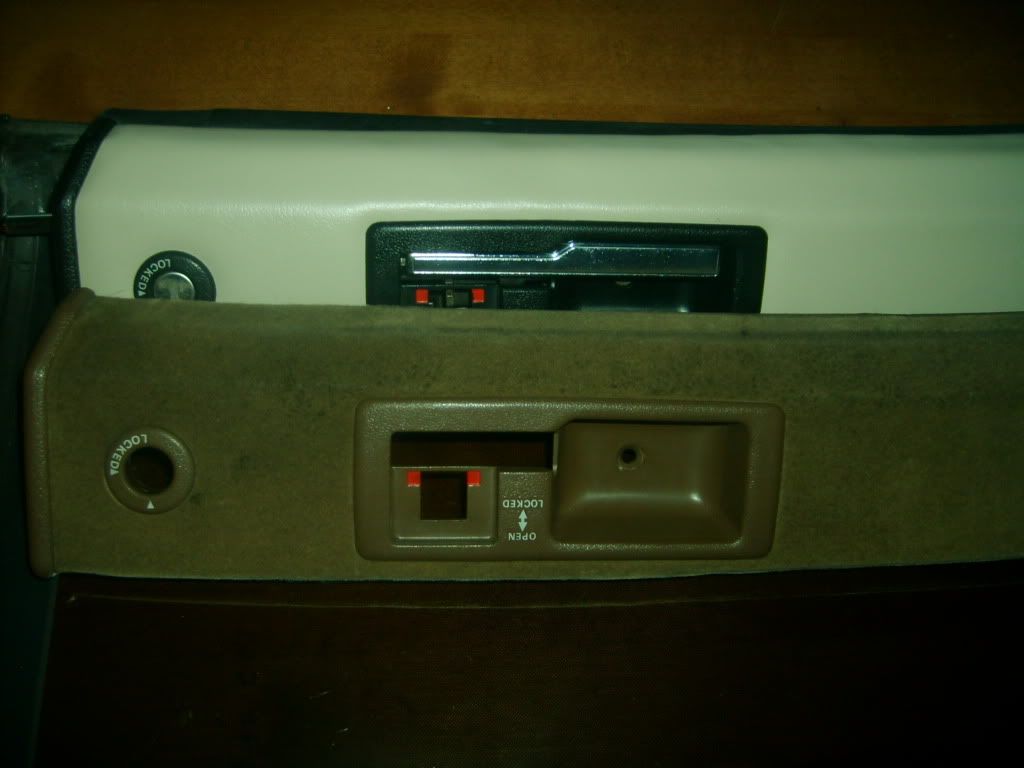
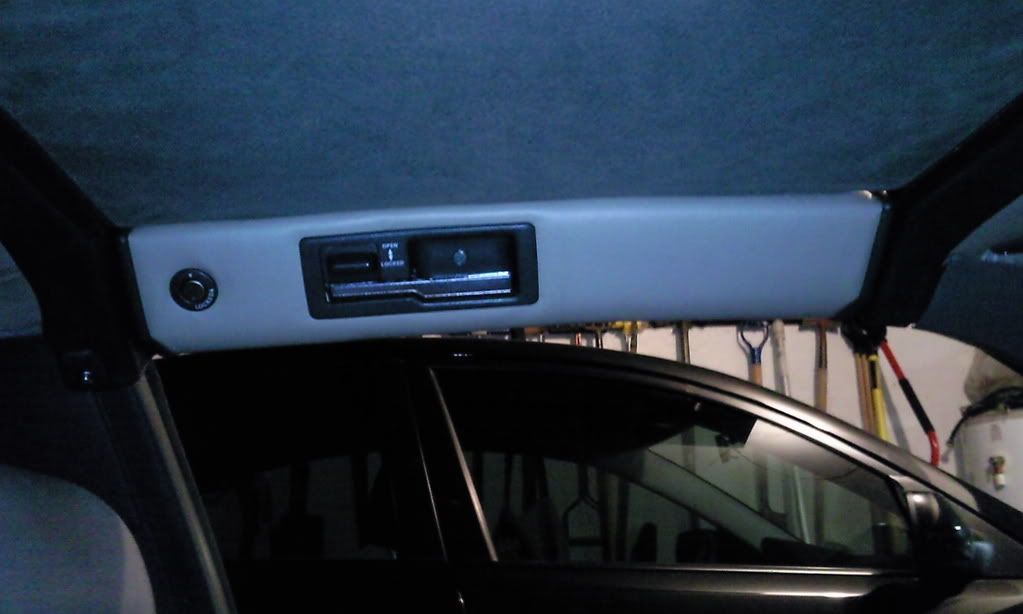
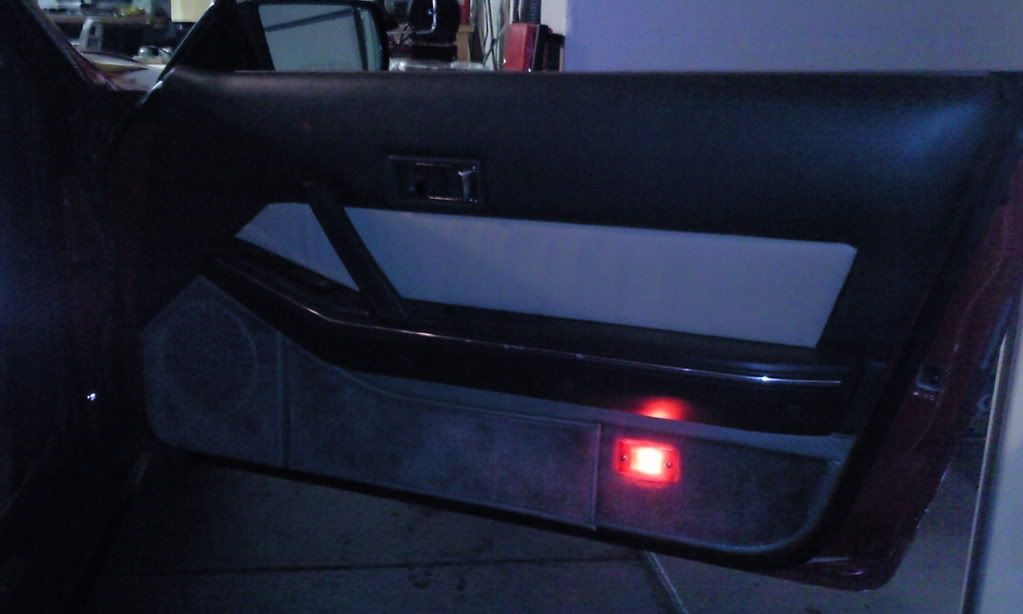
Ok, so I've done this a few times and decided since I took pics of most the process I'll post a quick how to since this seems to be a common problem. The trim on our T-tops often get old, brittle, or faded which leads to either the fabric coming undone on just looking crappy. This fabric covered piece is referred to as t-top garnish by Nissan. This is what they seem to look like most the time.
So here's the way to replace them.
Remove the button to release the lock on the handle.
Remove 2 screws from either side of the t-top.
Remove the 1 screw on the plastic behind the handle.
Pull the plastic sides gently over the locking bar area.
Lift and twist the garnish to clear the open handle.
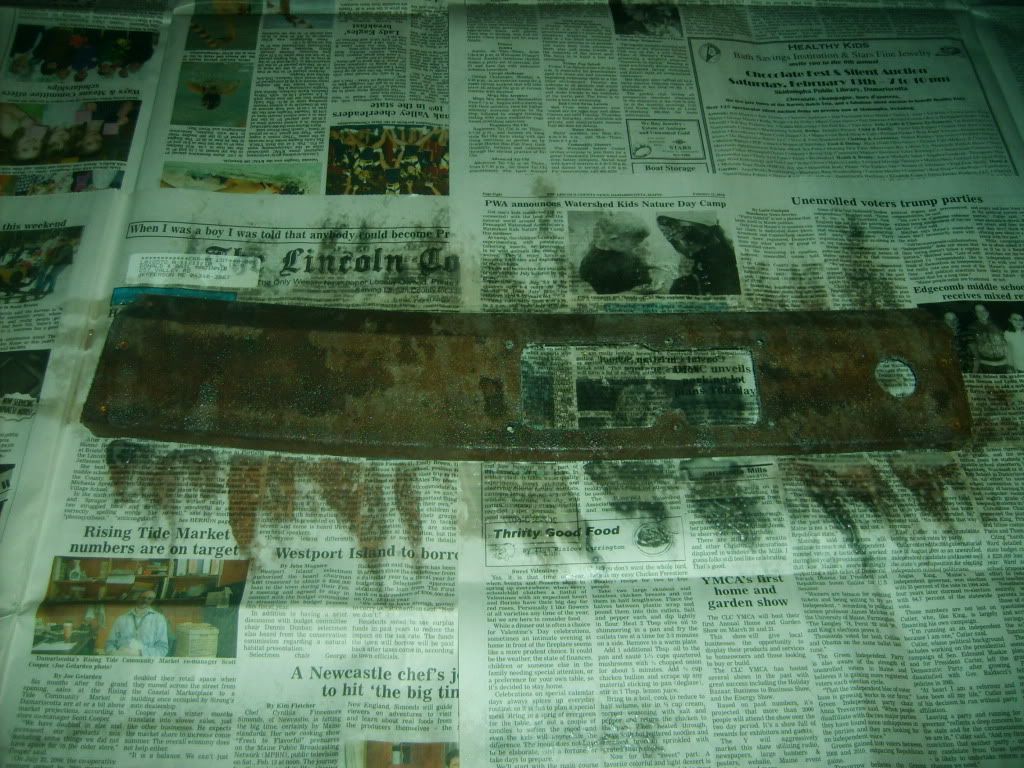
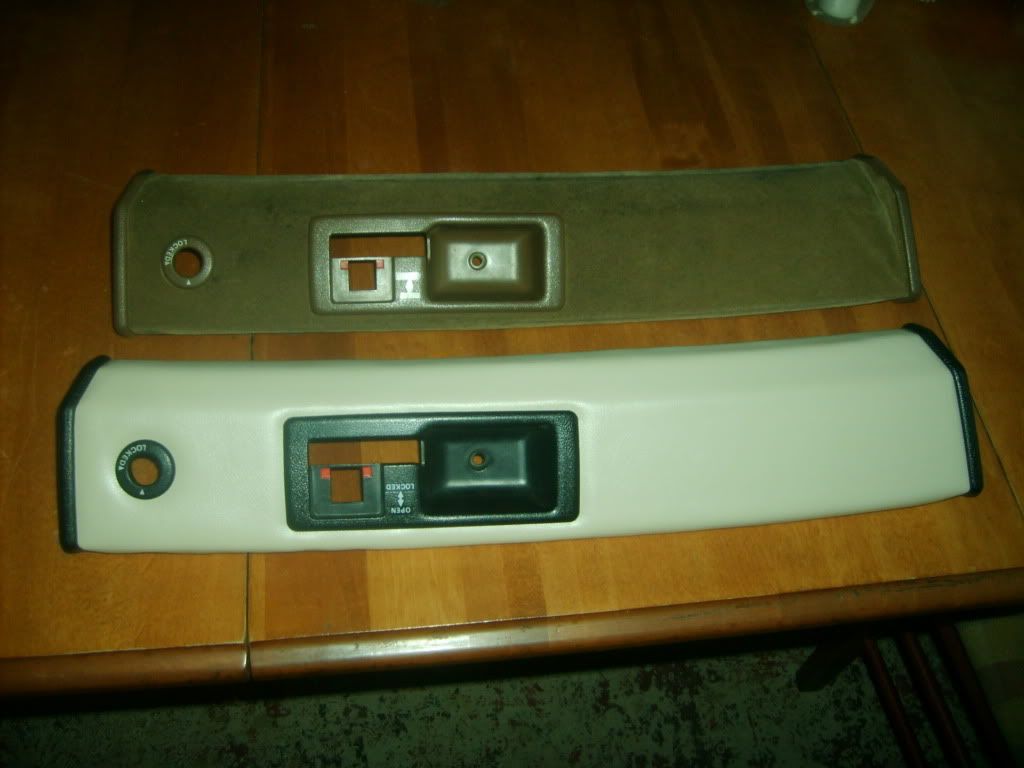
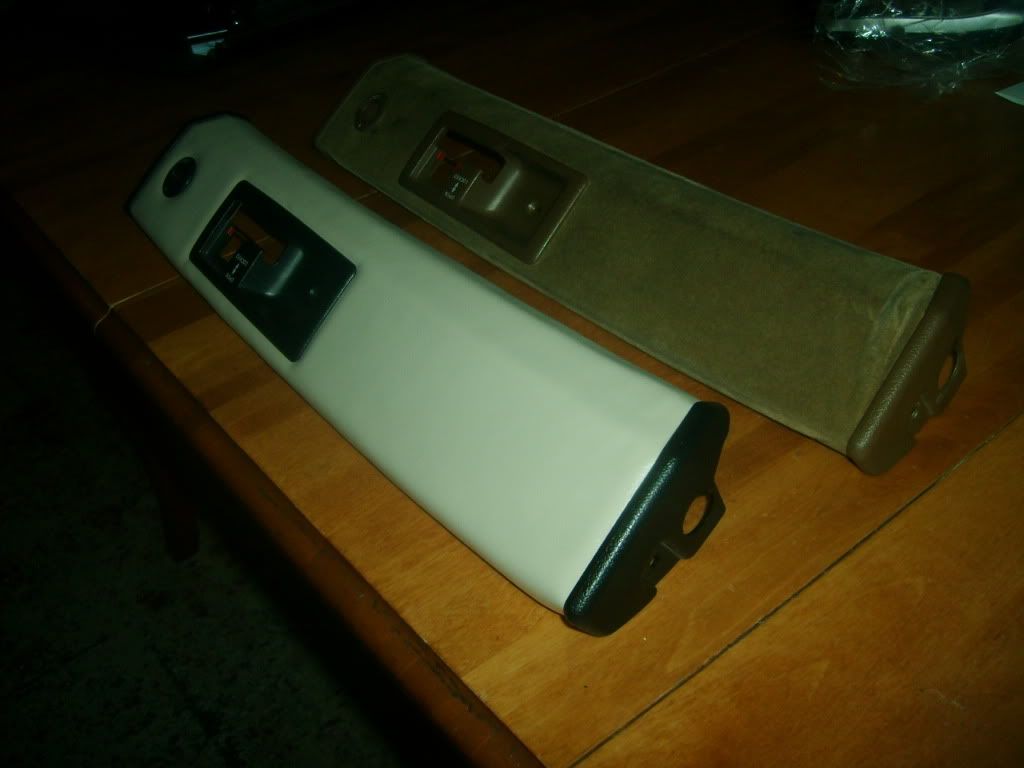
Now your garnish should be separate from your t-top.
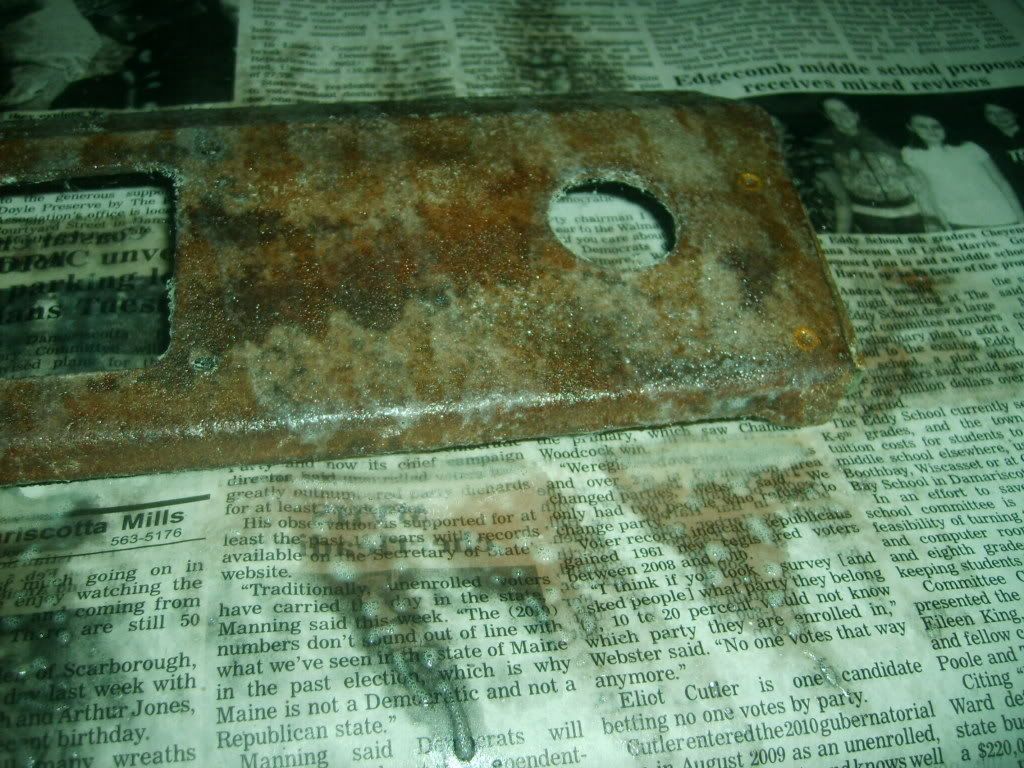
The plastic sides each have 3 pins that come through the back of the garnish and are flattened into rivets, the plastic by the handle has 6 of these same things. Carefully pop the rivets off, while retaining the back is not important, keeping the rest of the pin intact is. The plastic around the lock is held in place with a clip on the rear, simply slide it off and the plastic part slides out freely. Once they are removed you can simply strip the fabric away, from the factory there are shallow staples holding the fabric in place on the back side. Now you should be down to a cardboard like piece with metal on the ends. Clean it up, get rid of old junk on it, even a light sanding wouldn't hurt once the big stuff is off. Now for the pictures.
Spray headliner adhesive on the garnish. Mine states spray in alternate directions each coat, apply 3 coats, wait 5 min between coats.
After all coats are applied and adhesive has become tacky apply headliner material. Be sure to press out any bubbles, apply even pressure, and once you feel it has all been laid on properly, let sit for 30 min.
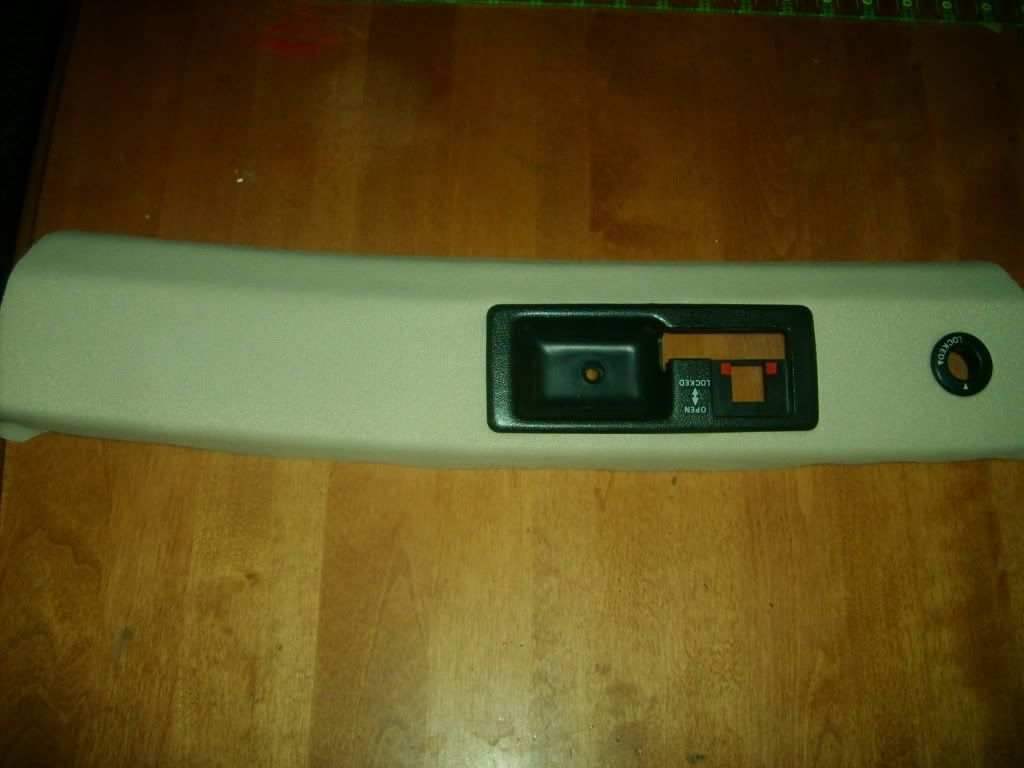
After 30 min cut the sides to the edge of piece, leave 1/2"-1" on top and bottom to lay over. Cut the handle out, and the lock, no need to leave room for overlap here. Also use a punch, or even a small enough screw driver to punch holes where the 6 pins belong around the handle. If you like this than you can spray the back side on the edges, follow the same steps as the front, and fold over the overlap for the top and bottom. At this point you can place plastic around the lock and the plastic around the handle back in place. It would look similar to this.
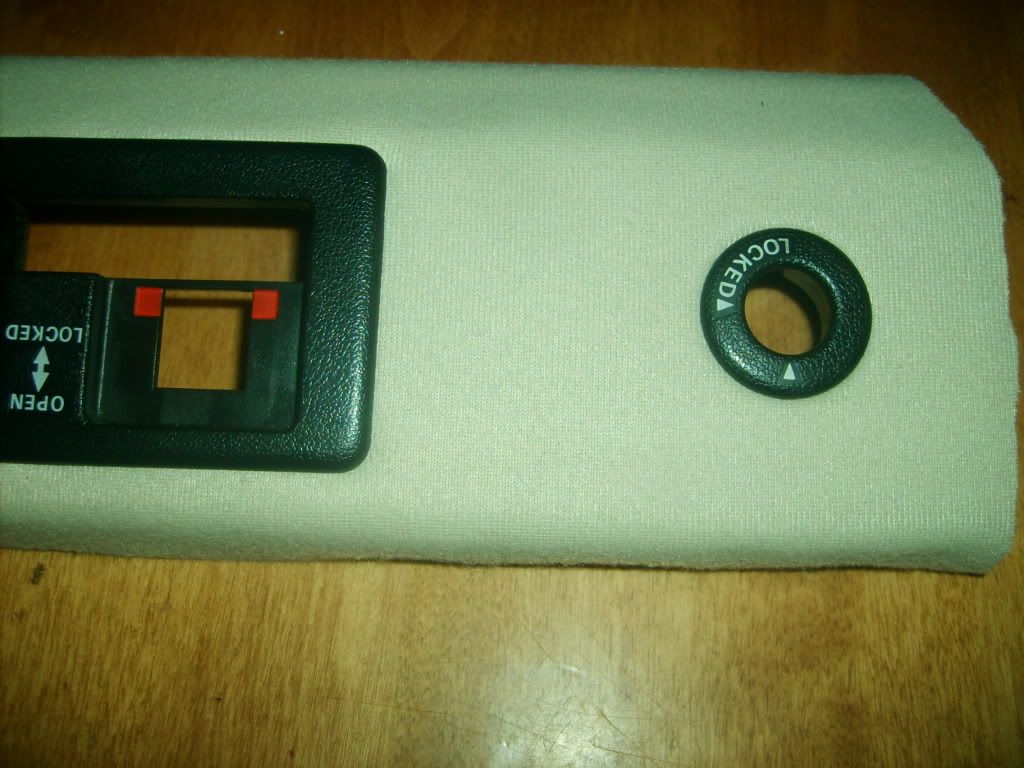
If you're feeling froggy you can use a different texture, like velvet, or I used vinyl. The problem with these are they are too thin and will leave gaps between your fabric and plastic trim. Like this, notice the end caps.
So if you feel up to the challenge, follow the past directions, then repeat again on top of the headliner material so you can lay velvet, vinyl, whatever you choose, on top of it. That way you can have a thin material that looks good, but have a cushion behind it and it will fill up the plastic trim. The only other things to remember in that case is that you want to leave extra overlap on the top and bottom for the top material to bond to the garnish piece as well. Also with something as think as vinyl, you need to make an X with a razor where the pins should go, once the pins start though you may need to use the razor to cut area's it will catch on from the back side. If you do not cut close enough to the edge on the sides, when you place the end caps on it may push the material inwards, creating a bubble. It should start looking like this.

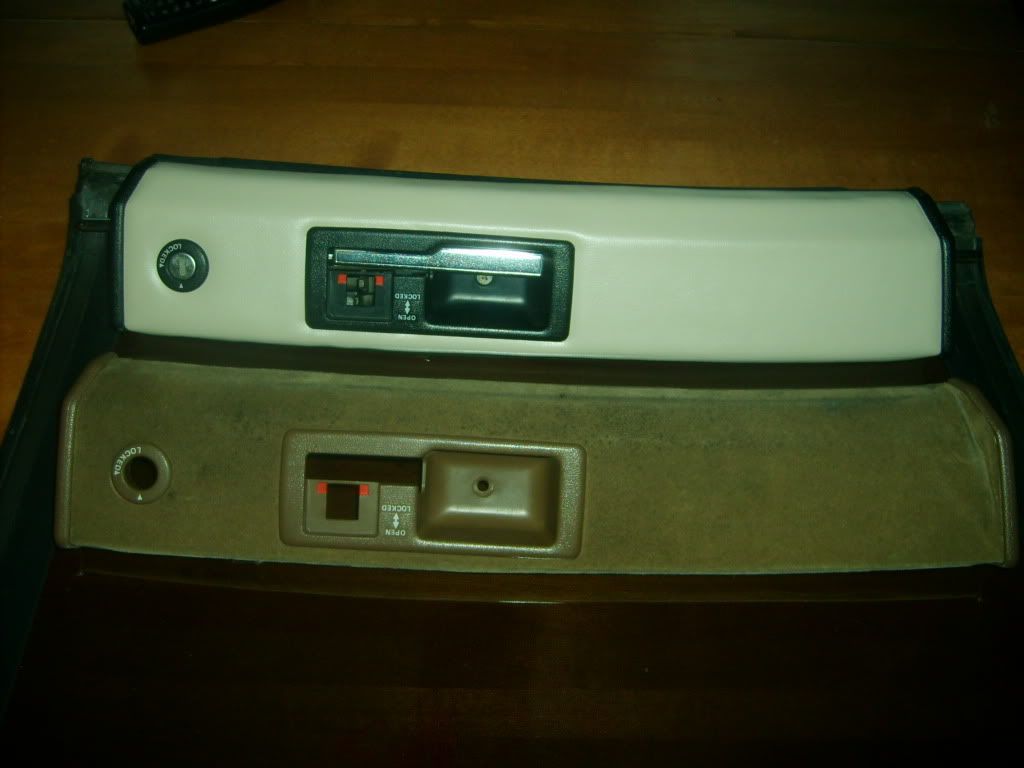
So once it's folded over and has dried, place the end caps on. You should be able to push them down on the fabric enough to make the 3 pins line up with the holes and pop them back in. If done correctly there is even enough pin showing that you could use a hot flat item to create a form of rivet, though probably not required. You can now place it back onto the t-top in the reverse of how you removed it, and finally
So a few before next to after shots to compare.

Hope this can help someone out.
So here's the way to replace them.
Remove the button to release the lock on the handle.
Remove 2 screws from either side of the t-top.
Remove the 1 screw on the plastic behind the handle.
Pull the plastic sides gently over the locking bar area.
Lift and twist the garnish to clear the open handle.
Now your garnish should be separate from your t-top.
The plastic sides each have 3 pins that come through the back of the garnish and are flattened into rivets, the plastic by the handle has 6 of these same things. Carefully pop the rivets off, while retaining the back is not important, keeping the rest of the pin intact is. The plastic around the lock is held in place with a clip on the rear, simply slide it off and the plastic part slides out freely. Once they are removed you can simply strip the fabric away, from the factory there are shallow staples holding the fabric in place on the back side. Now you should be down to a cardboard like piece with metal on the ends. Clean it up, get rid of old junk on it, even a light sanding wouldn't hurt once the big stuff is off. Now for the pictures.
Spray headliner adhesive on the garnish. Mine states spray in alternate directions each coat, apply 3 coats, wait 5 min between coats.
After all coats are applied and adhesive has become tacky apply headliner material. Be sure to press out any bubbles, apply even pressure, and once you feel it has all been laid on properly, let sit for 30 min.
After 30 min cut the sides to the edge of piece, leave 1/2"-1" on top and bottom to lay over. Cut the handle out, and the lock, no need to leave room for overlap here. Also use a punch, or even a small enough screw driver to punch holes where the 6 pins belong around the handle. If you like this than you can spray the back side on the edges, follow the same steps as the front, and fold over the overlap for the top and bottom. At this point you can place plastic around the lock and the plastic around the handle back in place. It would look similar to this.
If you're feeling froggy you can use a different texture, like velvet, or I used vinyl. The problem with these are they are too thin and will leave gaps between your fabric and plastic trim. Like this, notice the end caps.
So if you feel up to the challenge, follow the past directions, then repeat again on top of the headliner material so you can lay velvet, vinyl, whatever you choose, on top of it. That way you can have a thin material that looks good, but have a cushion behind it and it will fill up the plastic trim. The only other things to remember in that case is that you want to leave extra overlap on the top and bottom for the top material to bond to the garnish piece as well. Also with something as think as vinyl, you need to make an X with a razor where the pins should go, once the pins start though you may need to use the razor to cut area's it will catch on from the back side. If you do not cut close enough to the edge on the sides, when you place the end caps on it may push the material inwards, creating a bubble. It should start looking like this.
So once it's folded over and has dried, place the end caps on. You should be able to push them down on the fabric enough to make the 3 pins line up with the holes and pop them back in. If done correctly there is even enough pin showing that you could use a hot flat item to create a form of rivet, though probably not required. You can now place it back onto the t-top in the reverse of how you removed it, and finally
So a few before next to after shots to compare.
Hope this can help someone out.

Comment