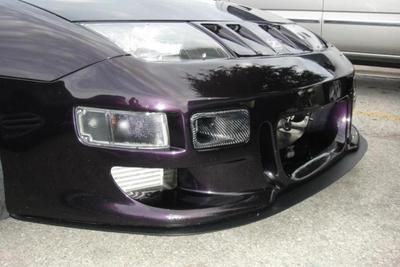
I thought i'd post this up for new owners (or old).
Symptom:
Intermittent interior lighting and exterior marker lighting failures. Occasional burning smell. Fuses all looked good.
Reason:
Corrosion on lightswitch connector #12 causing poor connectivity and high resistance/overheating.
Plug connector:


Harness Connector:

Action Taken:
Cleaned plug male connector with fine grit sandpaper.
Harness female connector was beyond repair and further damaged trying to extract it from the plug.
The female connector was cut off and the wire was cutback and stripped.
A new female connector was soldered in place.

These connectors can be replaced with a little effort, instead of using a crappy aftermarket crimp connector.
(which would get in the way of the harness plug anyway)
MSpaint rendering of connector replacement:

I used a metal stick pin with a wooden handle from a dissecting kit. The pin is very thin, strong and not easily bent.
I've used it for this purpose on many connector repairs under the hood.
A bit of grease might help keep corrosion from returning, but as i did not have any, i did not use it.
_____________
Intermittent Headlight failure:
Symptom:
One or Both headlights do not operate properly. Fuses all look good. Been told "Its your switch" over on z31.com.
Reason:
Corrosion buildup on lightswitch contacts causing weak or no connectivity. Contact fingers warped from overheating.
Action Taken:
Cleaned contact points with fine grit sandpaper to remove corrosion. Carefully re-adjust contact fingers.
The original headlight switch from my 84 turbo:

After a few years, this started giving me intermittent failures. I cleaned and re-adjusted it twice before i
sought out a replacement at the junkyard. Some owners have good luck with cleaning them, for others its more temporary solution.
I found this one, i believe its from a latter model Z31 as I've heard the contact fingers on the latter models are of a different metal,
possibly just a nickle coat?

(the photos may not show it well, but the contact fingers on the different switches are two very different colors)
When cleaning the contacts, use a fine grit sandpaper. Try not to remove too much material or you may need to readjust the contact fingers.
Re-adjusting them is a hit or miss affair and i would try to avoid the trial and error, which is why i got a replacement after two temporary fixes.
Clean both the upper and lower contact surfaces. Blow out any excess debris.


Contacts labeled for what they control. (may be reversed but you get the idea)

Tools:
Symptom:
Intermittent interior lighting and exterior marker lighting failures. Occasional burning smell. Fuses all looked good.
Reason:
Corrosion on lightswitch connector #12 causing poor connectivity and high resistance/overheating.
Plug connector:


Harness Connector:

Action Taken:
Cleaned plug male connector with fine grit sandpaper.
Harness female connector was beyond repair and further damaged trying to extract it from the plug.
The female connector was cut off and the wire was cutback and stripped.
A new female connector was soldered in place.

These connectors can be replaced with a little effort, instead of using a crappy aftermarket crimp connector.
(which would get in the way of the harness plug anyway)
MSpaint rendering of connector replacement:

I used a metal stick pin with a wooden handle from a dissecting kit. The pin is very thin, strong and not easily bent.
I've used it for this purpose on many connector repairs under the hood.
A bit of grease might help keep corrosion from returning, but as i did not have any, i did not use it.
_____________
Intermittent Headlight failure:
Symptom:
One or Both headlights do not operate properly. Fuses all look good. Been told "Its your switch" over on z31.com.
Reason:
Corrosion buildup on lightswitch contacts causing weak or no connectivity. Contact fingers warped from overheating.
Action Taken:
Cleaned contact points with fine grit sandpaper to remove corrosion. Carefully re-adjust contact fingers.
The original headlight switch from my 84 turbo:

After a few years, this started giving me intermittent failures. I cleaned and re-adjusted it twice before i
sought out a replacement at the junkyard. Some owners have good luck with cleaning them, for others its more temporary solution.
I found this one, i believe its from a latter model Z31 as I've heard the contact fingers on the latter models are of a different metal,
possibly just a nickle coat?

(the photos may not show it well, but the contact fingers on the different switches are two very different colors)
When cleaning the contacts, use a fine grit sandpaper. Try not to remove too much material or you may need to readjust the contact fingers.
Re-adjusting them is a hit or miss affair and i would try to avoid the trial and error, which is why i got a replacement after two temporary fixes.
Clean both the upper and lower contact surfaces. Blow out any excess debris.


Contacts labeled for what they control. (may be reversed but you get the idea)

Tools:
- 19mm socket with extension and ratchet.
Phillips screwdriver.
Wire stripper/cutter
Soldering iron
X=acto blade
Metal pin
Fine grit sandpaper.
Time:
Relative


Comment