-
Re: Molitor's Frame Rebuild
When I started this project I considered adding the you used. However, after consulting a structural
engineer (Z31.com member), his opinion was, the added little to the over all stiffness or rigidity of
the frame members when considering the unitized body as a whole.
hehe…
I am really sorry....but. It's a Damn Shame!
The cars are weakest here. I couldn't believe it, wouldn't believe it if I hadn't done it and drove it hard to feel the improvements myself. The more equal squalt of the chassis is obvious in turning and straight line abuse.
**IF the car I built was my own, the only other thing I would have done differently would be to build a tie for between the two front strut towers to the firewall, as the "feeling" now that sticks out with this modification is movement/flex in the chassis up front under extreme circumstances.
Thanx, for the neutral comment Gary…you are truley seasoned member.
Dan -
Re: Molitor's Frame Rebuild
For me and all the others that may read this, what is this you guys are referring to.?
Both of your guys attention to detail borders on the unhealthy…i like it!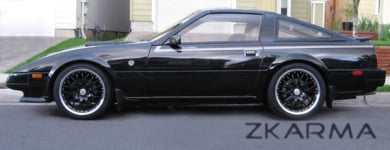
84 AE/Shiro #683/Shiro #820/84 Turbo -
Re: Molitor's Frame Rebuild
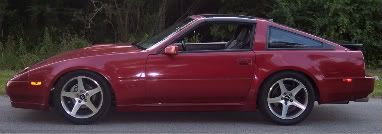
^^Look at where the rear frame rails end and the front ones start. Dan welded in material to tie these together.Bolt on, fast, z31. You can only pick two.
Old weaksauce numbers: 391hp/433tq
-
Re: Molitor's Frame Rebuild
Mike, look in the two photos. See where gary's rails end and Dans don't ever stop and continue all the way underneath the vehicle? I am sure just by looking at how you did it that it in fact increased rigidity by quite a bit. Honestly, I never realized the frame rails didnt continue further back than that. You think Nissan would've realized the benefits after doing it to their very own s30's in racing trim. Not doubting your friends motor-neering capabilities but its been proven time and time again over at hybridz.org that extending the frame rails full length increased body rigidity incredibly.
Your work on that car is absolutely ASTOUNDING gary and I love looking over your site for new ideas and mods to do to my z. Thanks for taking so many pics and keep on improving! peace."Its the s12's sexy over weight step daughter, the z31" -
Re: Molitor's Frame Rebuild
All I can say is WOW!!!! I am have that problem with my car where the rails are bent inwards and I was wondering how to fix it. I just found my way! They both look amazing but my car will be no show piece I'm going for straight performance and rust prevention. I will put the ties in though. AEladyZ do you have a write up for what you did?
So sleepy -
Re: Molitor's Frame Rebuild
No actual write up, just took my time making a cardboard mock-up of the pieces I needed, and cut them up with a plasma cutter, then welded them in.
-I used a wire wheel and stripped all the oem rubberized undercoating off the frame rails/chassis.
-I then took 1/8" angle and plate steel and re-boxed the frame rails from the downward angled area beginning in the engine bay to the oem rear section just before the gas tank area.
-I did alot of welding and grinding..starting with tack welds, then finishing with 1" welds spaced 1.5" apart through-out.
-I then then sealed everything with seam sealer before painting to keep the elements out and to give the seamless look.
As for the rear ties, I used 1/8" 1x3 tubing and full welded it to the chassis and overlapped a section of 1/8" plate to full weld and lock these sections together.
-If you look closely, you'll see the next weak area was in the rear where the rear differential mounts.....see the 1/8" plate steel "T" sections fully welded to the oem frame rails.
*I didn't bother boxing the rear section of the oem subframe because there is already sufficient layering of steel here from the factory. -
Re: Molitor's Frame Rebuild
I think both Dan and Gary did an exceptional job, but it looks as though the sections of plate steel that Dan welded in would help, and it's not like it would have been a big downer if it DIDN'T help, seeing as the don't look like they would get in the way, nor are they very hard to make. A grinding wheel and some spare time on weekends would have made that a good choice.
However, I'm sure this can be solved easily without much worry. Gary, I think you should perhaps find some steel dowel that you can thread on one end with a nice large bolt size, drill the frame out near where dan made his modifications and slot the dowel into the hole and weld it there, then drill some small holes on the side to inject more structural foam.
Having bolt holes would allow you to tie in many more places to some "torque boxes" or chassis/frame endings while allowing you to improve on the design by continuously changing the stiffness and geometry of the frame connectors that would bolt to these welded holes.
I think that would be a fair solution and would require minimal welding, grinding, and re-finishing.
Plus, It would stand out more as a chassis improvement with huge powder coated bars hanging off the car :-D
Excellent work guys. The Z31 forums have some dedicated individuals when it comes to ground-up restos. -
Re: Molitor's Frame Rebuild
i just have one question where did you source your foam for teh injection?live fast,drive hard,and enjoy the ride!

Copyright © 2006–. All rights reserved. Privacy Policy