Highmount stop light repair
-
 mwolvinmSenior Member
- 249
Highmount stop light repair
Has anybody repaired the highmount stoplight? Mine has 8 LED's out and am interested in advise on how to open the darn thing. I've already got it separated from the trim and disconnected from the car.
--------------
Legal stuff:
**Nissan Employee**
Any information shared is simply my own opinion and NOT the opinion of Nissan
not legal stuff:
'88 300ZX 2+2-- driving… just details left
'22 Q60RS-- I tell the wife it's hers…
'87 Chaparral bowrider-- the next project
'00 Corolla-- kids car.
'14 E-350-- Gotta haul those kids in something. -
 mwolvinmSenior Member
- 249
I'm taking the dead silence to mean that either nobody has tried this, or the people that have haven't been on yet. So… experiment time! I'm thinking I'll have to cut the unit open, which means that at some point I'll have to bond it back closed. I'm unsure of the plastic type, but I'd heard that acetone can make a good bonding agent. The part has a broken tab and I'll be using that for the test. After making a bowl out of aluminum foil, the tab was dunked into the acetone. Note that the part should not be submerged, but rather the ends to be bonded should be held in the acetone. Don't ask how I figured that out.... then while still wet, the tab was held in place on the part and allowed to dry. 30 seconds later, the part appears to be holding well. Then I went after some of the stress cracks in the screw holes. Dipping my finger in the acetone and rubbing on the cracks seems to bond them back together. So far a success… now to figure out how to take the unit apart.--------------
Legal stuff:
**Nissan Employee**
Any information shared is simply my own opinion and NOT the opinion of Nissan
not legal stuff:
'88 300ZX 2+2-- driving… just details left
'22 Q60RS-- I tell the wife it's hers…
'87 Chaparral bowrider-- the next project
'00 Corolla-- kids car.
'14 E-350-- Gotta haul those kids in something. -
 DunkineSenior Member
- 255
Yeah, same here on the tabs and screw hole cracks. I JB Welded mine back together. The little metal tabs I JB welded into place too. The LED part is sealed isn't it? I wonder if you could cut behind the bad ones, fix / replace them and then just JB weld the piece back on. If I run across a broken one, I will mess with it, but will be a while before I'm down where my parts cars are.
Last edited by Dunkine; 11-12-2017, 09:18 PM.
- 1 like
-
 Z_KarmaAdministrator
- 3318
Yeah, solvent welding plastics with acetone is much stronger bond than using a super glue product. That's something i learned along with getting into 3D printing recently.
Unfortunately it doesn't work on a lot of the interior non ABS trim parts where a tab or something has broken. Some plastics cannot be solvent welded.
But, you are correct, I've never seen anyone document a repair on one of these. Given the age of it, and the tech at the time, it's most likely gonna be
the classic domed LED (~3mm) thru-hole soldered to a PCB assembly. You should be able to find replacement LED's easy enough.
Unfortunately, you might run into the situation where the LED's you purchase today, are a much more efficient diode with a lower forward voltage,
meaning they could be brighter than the old ones at the same operating voltage, and look just as patchy. Without knowing the specs of the original LED's this is a possibility.
Hopefully, it's just a case of faulty solder joints and you can just touch up the solder joints with a iron, solder and some flux.
Good luck, post up some pics of the disassembled lamp if you can.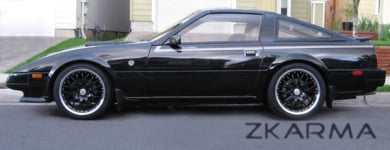
84 AE/Shiro #683/Shiro #820/84 Turbo -
 mwolvinmSenior Member
- 249
Will do. I'm going to hit up the junkyard soon--- there's a Z in stock that has one. One of the two units will be coming apart; most likely with a coping saw. I had the same thoughts on the type of LED, but hadn't thought about brightness. One solution could be to replace all of them at once. They're cheap enough. One goal I have moving forward is engineering the part so that I can get back into it at a later date. I have no plans on selling it and have had it since 2006.--------------
Legal stuff:
**Nissan Employee**
Any information shared is simply my own opinion and NOT the opinion of Nissan
not legal stuff:
'88 300ZX 2+2-- driving… just details left
'22 Q60RS-- I tell the wife it's hers…
'87 Chaparral bowrider-- the next project
'00 Corolla-- kids car.
'14 E-350-- Gotta haul those kids in something. -
 mwolvinmSenior Member
- 249
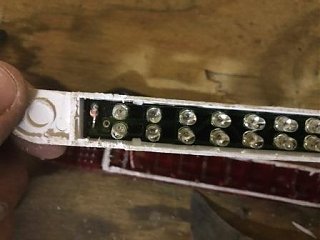
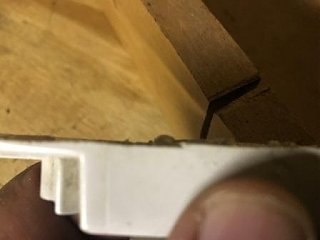
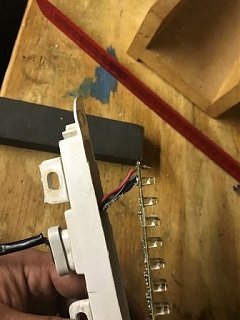
I got impatient.... Here's the teardown with pics I ended up cutting only the ends with the coping saw then using a razor to cut the sides. the LED's extend into the red lens, which means if you cut the length of the unit, you will cut every LED. Total teardown time was about an hour. This looks workable, but I don't know if I can modify it so that it can be easily torn down later. The board is held in by tabs molded into the white surround. 12v on the input still causes the (operating) lights to illuminate. Unfortunately, this doesn't look like a solder issue.--------------
Legal stuff:
**Nissan Employee**
Any information shared is simply my own opinion and NOT the opinion of Nissan
not legal stuff:
'88 300ZX 2+2-- driving… just details left
'22 Q60RS-- I tell the wife it's hers…
'87 Chaparral bowrider-- the next project
'00 Corolla-- kids car.
'14 E-350-- Gotta haul those kids in something.
- 1 like
-
 mwolvinmSenior Member
- 249
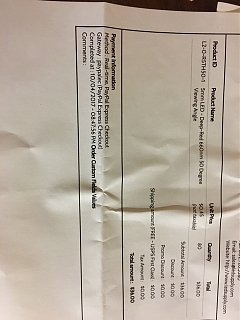
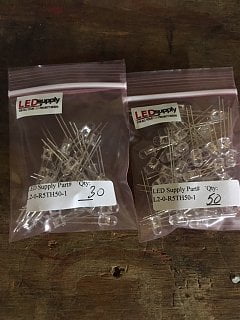
The LED's are here and the repair work has begun. That's 80 LED's from LEDSupply.com…
--------------
Legal stuff:
**Nissan Employee**
Any information shared is simply my own opinion and NOT the opinion of Nissan
not legal stuff:
'88 300ZX 2+2-- driving… just details left
'22 Q60RS-- I tell the wife it's hers…
'87 Chaparral bowrider-- the next project
'00 Corolla-- kids car.
'14 E-350-- Gotta haul those kids in something. -
 mwolvinmSenior Member
- 249
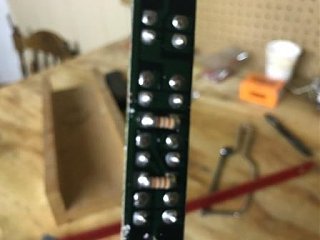
Here's some pics of the repair as it progresses. This is definitely going to take some time.
IMG_0089.JPG
This is one LED replaced. Can you guess which one???
IMG_0098.JPG
14 done and with the red lens in place. You can really see how dim the orignals have become over time. Or are the new ones called "super bright" for a reason???
IMG_0101.JPG
Some of the solder work. I'll go back and trim the legs after all the Soldering is done. This will ensure I don't remove a new one accidentally.
IMG_0100.JPG
Old ones on the top. New ones on the bottom. The new ones are much clearer.--------------
Legal stuff:
**Nissan Employee**
Any information shared is simply my own opinion and NOT the opinion of Nissan
not legal stuff:
'88 300ZX 2+2-- driving… just details left
'22 Q60RS-- I tell the wife it's hers…
'87 Chaparral bowrider-- the next project
'00 Corolla-- kids car.
'14 E-350-- Gotta haul those kids in something.
- 1 like
-
 mwolvinmSenior Member
- 249
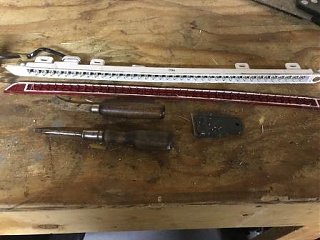
All the solder work is done and the case is glued back together now. My oldest daughter got to learn how to solder on this project… 40 LED's later, her solder joints are looking pretty good. I made an ABS glue from 9 ABS weld rods from harbor freight and some acetone. Seems to be working pretty good.
IMG_3597.JPG
This is whats left of the ABS glue.
IMG_3599.JPG
Glue applied to the back side where the cuts are. 24 hours later I can't pull it apart.
IMG_3598.JPG
Here's the remaining weld rods
IMG_3600.JPG
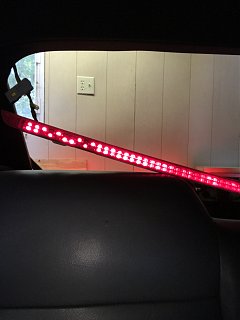
Set on top of the car, using jumpers with a corolla (battery's out.) holding the brakes. Looks good, but there's an obvious color difference. Next up.... manufacture 6 clips for the trim plate. I have one good one to model them after. I'm thinking I should get red tinted light bulbs for the combi-lamps to fix the color issue.--------------
Legal stuff:
**Nissan Employee**
Any information shared is simply my own opinion and NOT the opinion of Nissan
not legal stuff:
'88 300ZX 2+2-- driving… just details left
'22 Q60RS-- I tell the wife it's hers…
'87 Chaparral bowrider-- the next project
'00 Corolla-- kids car.
'14 E-350-- Gotta haul those kids in something.
- 1 like
Comment
-
 mwolvinmSenior Member
- 249
3D drawing of the clip is done. Still need to print it and test. I don't have a 3D printer, so if anyone wants to be a guinea pig, be my guest. Design is public on TinkerCAD.--------------
Legal stuff:
**Nissan Employee**
Any information shared is simply my own opinion and NOT the opinion of Nissan
not legal stuff:
'88 300ZX 2+2-- driving… just details left
'22 Q60RS-- I tell the wife it's hers…
'87 Chaparral bowrider-- the next project
'00 Corolla-- kids car.
'14 E-350-- Gotta haul those kids in something.

Comment